Sunday, July 29, 2012

(Stinkin' cute!) Hoyt's 2nd Birthday card

Yesterday was my lil grandson, Hoyt's, 2nd birthday and he was TRULY & TOTALLY ADORABLE!! My mom (great-grandma) and I sat together and laughed through the entire gift-opening event. OOOH MY GOSH!! The only word that comes to mind which somewhat describes the lil guy's reaction to every-single-gift is "DELIGHTED!" Hoyt is normally reserved -- almost stoic. And, he was still QUIET and IN-CONTROL, but when he unwrapped his packages, his face expressed -- yes, it's the only word that will suffice -- DELIGHT!! His eyes crinkled...his mouth had either the BIGGEST grin OR formed a perfect "OH!!!" of excitement and glee!! Mom and I agreed that we'd seen LOTS of lil birthday boys and girls throughout the years, but NONE who sweetly responded to EVERY gift, one-after-the-other! I'm grinning, just thinking about it.

Grandpa and I got Hoyt a Little Tikes basketball and goal (and some Nerf shooters -- he's ALL boy) and I used a "basketball theme" on his card, which features a Hugware clipart bear purchased a few years ago -- and a black & white basketball goal graphic that I dug-up from my digi files. The sentiments were made with PrintMaster software, the numeral two made with a PTI die from paper that I hand-striped, and my Sizzix balloon die got more action for the inside. The basketballs on the balloon were digis from my files that I cut-out with a 1 3/8" circle punch -- perfect size. The "wish" sentiment was made with a stamp. All very clean and direct -- no muss/no fuss -- just like lil Hoyt.

I had no envelopes large enough for the card, so I used some checked paper and made one using this tutorial as a guide (scroll down the page).


Monday, July 16, 2012

MORE CONVERTED YMCA CARDS

After completing my grandson's first birthday card, I still wanted to create, so I decided to tackle some more YMCA card conversions. These converted cards need to be SIMPLE and CHEAP to make. Well, I just don't know HOW one could make them more cheaply than these last three!

Again, here is a photo of an original note card that can no longer be used since they feature a former logo and byline.
My continuing task is to USE the "forbidden" cards to MAKE cards that are USEFUL -- and do it with almost NO out-of-pocket expense. As before, I used panels from the "old" cards to create new card fronts. I made use of the red and black color scheme and simply die-cut shapes, stamped and edged them with ink, then adhered them in place. I slipped off to bed at 1:00 a.m. thinking I'd completed three cards. But, this morning, before taking the cards to work, I decided that adding some lil die cut butterflies would be the FINISHING touch, so I put my Sizzix to quick use and cut 'n embossed a few butterflies -- and added them to the cards.

Here are BEFORE AND AFTER shots:


Sunday, July 15, 2012

IT'S A 3-RING BIRTHDAY FOR PRESTON!

Moriah likes to "do themes" for her children's birthdays -- and the theme for Preston's first birthday is "CIRCUS." I am sure, knowing her as I do, that the birthday decor will be PHENOMENAL!! (No, she didn't get her "over the top" party enthusiasm from her mother -- but I surely enjoy observing the PURE THRILL that her children feel at Party Time!)

I made a LARGE card for our lil guy -- and will likely have to use wrapping paper to construct an envelope to fit it. Preston's party is Monday night, so I'll make the envie tomorrow.

Grandpa and I will write our messages "in the grass," so I left some "sparse" area for that purpose. I used my PrintMaster software for the balloon sentiments and the banner on the front, then used a Sizzix die to cut the balloon shapes. After we sign, I may add some 3-D "circus animal" stickers to the inside. We'll see.


Thursday, July 12, 2012

Wedding card for co-worker

A young lady, who works the front desk at the Y, invited me to her "Adult Ladies Only" slumber party/wedding shower to be held this weekend. (EEEEK!!!!)

I didn't check-out the online site where I could order such lovelies as edible lotion and undergarments. Ummm...OBVIOUSLY, she doesn't know me. But, it's NICE to be included -- right?!!!

When I mentioned to a co-worker that I intended to make her a card and put some money in it -- and give it to her at work, she asked if the card could be from us BOTH and she would ALSO include some cash. Suuuuuure! No problem.

Here is the card I made which I will present tomorrow. I made GOOD USE of some dies, an edger, and some strips of lace that I bought at a thrift shop several weeks ago. I photographed the card immediately after completion and the glue was still wet -- sorry 'bout that. It DID dry.


Saturday, July 7, 2012

BABY SHOWER CARD FOR HAYLEY!

Hayley and her husband, Austin, are expecting their FIRST child in less than a month. Hayley is the eldest daughter of my husband, Jer's, baby sister, Cami. (I'll wait while you figure it out.)

Last weekend, I attended a baby shower and, of course, a handmade card was in order! The invitation stated that little Audree Camille's nursery colors are pink, lime green, and brown, so I designed the card accordingly. I used a kraft card base and chose cheery paper colors and patterns. Though I have a jar stamp/die set, I used a larger jar stamp and just hand-cut it. (Twice on the lid.)


I gave the kraft envelope a lil attention, too...


And, the gift wrapping...


The mother-to-be is carrying her baby JUST as her own mother carried HERS. From behind, one can't even tell that Hayley is pregnant -- and from the front, it looks as though she just stuck a volleyball under her shirt! AMAZING to me since I became GI-NORMOUS with EACH of my five pregnancies!


BIRTHDAY CARD FOR MOM'S 79TH!!

As I considered making Mom's birthday card for this year, I was drawn to have a FORMAL design, so chose "heavy" paper and a new, large stamp by Stampin' Up. I used "Tangerine Tango" for the stamped image, then toned down the orange by scrubbing over it with "Crumb Cake" ink on a sponge, creating an uneven and non-uniform shaded effect. Better.

More "Crumb Cake" ink was scrubbed over the lace for it was just too pristine for my taste. I wondered if the lace treatment might "bug" Mom a bit, as I trimmed it BEYOND the edges of the card (but, if it did, she made no indication). When it came to adding a flower/bow, I had a change of heart and decided to add a lil whimsy to the formal look, so made a messy flower from pages of an old book and layered it over a kraft paper punched flower.

When I "GROW UP" as a card maker, I hope to accomplish REAL layering -- I've only successfully accomplished it a couple of times -- but, until then, SIMPLE will just HAVE to suffice. At least, I make the effort at handmade, right??


Jer's 2012 Birthday card

I kept his card SIMPLE since Jer's not "into" frou-frou of any kind. (He's ALL ABOUT heartfelt messages written IN his cards, though. I felt especially BLESSED by his life, this year, so my message to him was GOOOOD...grin.)


Friday, July 6, 2012

CONVERTING CARDS FOR THE YMCA!

All YMCA's are using new logos and bylines and everything with the former are being phased out, including signs, t-shirts -- all kinds of items. Hold that thought.

A few weeks ago, I suggested to my boss, the CEO, that he might want to send personalized condolence cards to Y patrons upon the death of family members. I suggested to him that I could make simple, handmade cards -- and he asked me to make a few as samples.

Well, I remembered seeing a supply of note cards that featured the former YMCA logo and I determined to "tweak" them into service as updated condolence cards.

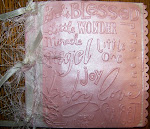
Here's a photo of the OLD card.

My first effort was to TOTALLY cover the card front, using a card stock panel with a digital flower and digital sentiment. Not bad, but it didn't ring any bells for me. Ho-hum.

For my second attempt, I realized that the signature and title on the former cards could be salvaged. It was just the logo and byline that were outdated. So, I used my Sizzix "Top Note" die and cut shapes from black and red floral paper; trimmed them to fit, and added easy-peasy banners using red card stock strips to cover remnants of the old logo peeking from beneath the patterned paper. I sacrificed a premade card by stamping the sentiment on the inside sections of the front and back; then, oval-punched and adhered the sentiment on the refurbished card fronts. Some of the cards got rounded-corner treatment and others were left as-is.


My boss was QUITE impressed (grin) and upon seeing them, IMMEDIATELY asked if he could have one for he NEEDED to send a condolence card! (The one I gave him is not pictured, as I forgot to photo them until AFTER presenting them to my boss.)

As time permits, I will make new/different designs, but I think the oval-cut sentiment will be used for them ALL. It seems perfectly suited for use by a Christian organization.

It really pleases me to use my creative hobby to enhance my position at the Y. (By the way, I have been "upgraded" from the title of Executive Secretary to Administrative Assistant! How 'bout that?? grin)