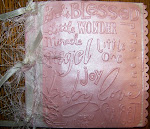
Christie, who is married to our second (of three) sons, Trey, turned 28 years-old, yesterday. Beside a gift card (her hubby states that new clothes are in order), Jer and I will enjoy some GRANDDARLINS TIME with Abigail and lil Hoyt, so that Trey can take his sweet wife out this evening.
I have introduced Abigail to card making, which she LOVES, so plan to have a little "kit" for her to enjoy tonight. Papa and Hoyt will just have to enjoy some "guy time," while Abigail and I create!
Here is Christie's card.
Showing posts with label birthday card. Show all posts
Saturday, March 24, 2012
Monday, January 9, 2012
My Baby is Turning 18!!!
The youngest of my five children is turning 18 on January 23!!
As important a milestone as that is for HER, I am EQUALLY excited that I survived ALL thirty-five child rearing years with my sanity!! (My eldest, Moriah, turned 18 years-old in the year that Morissa was born. OOOH, MY GOODNESS!!)
Morissa is VERY artistically gifted, but STILL has an appreciation for my cardmaking efforts, so I put some EXTRA OOMPH into making her birthday card. (grin)
I made an easel card using two die-cuts from a Paper Trey Ink die, labeled "Front & Center." The die's original purpose is to create decorated panels for adhering to the front & back of little gift bags, but I envisioned another use -- and here are photos of the result. (I will give this another "Go" in the future for I think the die worked out GREAT for making a card! Hope Morissa likes it, too.)
As important a milestone as that is for HER, I am EQUALLY excited that I survived ALL thirty-five child rearing years with my sanity!! (My eldest, Moriah, turned 18 years-old in the year that Morissa was born. OOOH, MY GOODNESS!!)
Morissa is VERY artistically gifted, but STILL has an appreciation for my cardmaking efforts, so I put some EXTRA OOMPH into making her birthday card. (grin)
I made an easel card using two die-cuts from a Paper Trey Ink die, labeled "Front & Center." The die's original purpose is to create decorated panels for adhering to the front & back of little gift bags, but I envisioned another use -- and here are photos of the result. (I will give this another "Go" in the future for I think the die worked out GREAT for making a card! Hope Morissa likes it, too.)
Tuesday, December 6, 2011
MARTHA STEWART TO THE RESCUE!!
As seems to be my USUAL response, I was simply NOT satisfied with Sherry's birthday card from yesterday's post. Something about the LEAVES just seemed OFF.
So, a few minutes ago, I browsed through my past postings and came upon a card that used a Martha Stewart "twig" punch. EUREKA!! I just KNEW some twigs would make ALL the difference in my newest card -- and I DO believe that I was right!! (grin)
Here's the NEW & IMPROVED version...
And, here is the inside which I kept simple, using a smaller corrugated die-cut heart with centered jewel.
Okay. I'm happy, now.
So, a few minutes ago, I browsed through my past postings and came upon a card that used a Martha Stewart "twig" punch. EUREKA!! I just KNEW some twigs would make ALL the difference in my newest card -- and I DO believe that I was right!! (grin)
Here's the NEW & IMPROVED version...
And, here is the inside which I kept simple, using a smaller corrugated die-cut heart with centered jewel.
Okay. I'm happy, now.
Monday, December 5, 2011
A Birthday Card for a BEAUTIFUL Friend
Sherry's birthday was November 17th, but each year we wait until after Thanksgiving to celebrate together, when life is in lull-mode between Thanksgiving and CHRISTmas. It seemed anti-climactic to present her a l-a-t-e BIRTHDAY card, so I omitted a theme from the card front and will write a personal note inside instead of having a printed sentiment.
Hers is the VERY FIRST card created in my new crafting studio!! "New" as in refurbished from what was previously the "preschool room" during my seventeen childcare years and a "sitting room" for Jer and me prior to that. It, also, served as a "nursery" for my last two children until they were old enough to occupy bedrooms some distance from their mama. And, originally, it was the west end of a large living room until, approximately twenty-three years ago, when we decided to construct a dividing wall . (Hmmm...I wonder how long it will serve as my special craft room?)
Honestly, it felt ODD to be sitting in privacy, surrounded by my cardmaking supplies, instead of monopolizing the dining room table with family members traipsing in-and-out on treks to the kitchen. Weird experience. Not BAD...exactly. But, definitely NOT (yet) comfortable.
Well, here is the FIRST FRUIT from my "garden" retreat. Ha!
I still have a few paper flowers made from a worn-out children's book, so put one to work on Sherry's card. I used a kraft card base and a cream panel, roughed-up and edged with "wild honey" Distress Ink. A page from 7 gypsies' "collections from the journey" paper pack was torn and distressed with "wild honey" and "brushed corduroy" Distress Inks. Some dotted kraft S.U.! punched petals were reshaped into leaves and tucked beneath the flower.
A couple lengths of earth tone "ticker tape" were adhered along the left side of the panel, topped with a distressed corrugated die-cut primitive heart and layered buttons, along with a tuft of mocha tulle. Bottom-right is a cluster of sparklies and a half-pearl.
Hmmm...this FIRST card may not be publication-worthy, but I'm not ashamed of it -- and I have HIGH HOPES that Sherry will actually LIKE it!! (grin)
Hers is the VERY FIRST card created in my new crafting studio!! "New" as in refurbished from what was previously the "preschool room" during my seventeen childcare years and a "sitting room" for Jer and me prior to that. It, also, served as a "nursery" for my last two children until they were old enough to occupy bedrooms some distance from their mama. And, originally, it was the west end of a large living room until, approximately twenty-three years ago, when we decided to construct a dividing wall . (Hmmm...I wonder how long it will serve as my special craft room?)
Honestly, it felt ODD to be sitting in privacy, surrounded by my cardmaking supplies, instead of monopolizing the dining room table with family members traipsing in-and-out on treks to the kitchen. Weird experience. Not BAD...exactly. But, definitely NOT (yet) comfortable.
Well, here is the FIRST FRUIT from my "garden" retreat. Ha!
I still have a few paper flowers made from a worn-out children's book, so put one to work on Sherry's card. I used a kraft card base and a cream panel, roughed-up and edged with "wild honey" Distress Ink. A page from 7 gypsies' "collections from the journey" paper pack was torn and distressed with "wild honey" and "brushed corduroy" Distress Inks. Some dotted kraft S.U.! punched petals were reshaped into leaves and tucked beneath the flower.
A couple lengths of earth tone "ticker tape" were adhered along the left side of the panel, topped with a distressed corrugated die-cut primitive heart and layered buttons, along with a tuft of mocha tulle. Bottom-right is a cluster of sparklies and a half-pearl.
Hmmm...this FIRST card may not be publication-worthy, but I'm not ashamed of it -- and I have HIGH HOPES that Sherry will actually LIKE it!! (grin)
Labels:
birthday card,
paper flower,
Sizzix,
Stampin' Up
Saturday, July 2, 2011
HUBBY'S BIRTHDAY CARD
Tomorrow is Jer's 60th (WOW!!) birthday and here is the card I made.
On the kraft card stock base, I adhered a bit of plaid wallpaper (donated to me by a local wallpaper business). The Bingo card is from a S.U.! background stamp. The numerals I stamped in the grids have special meaning...
Jer was 15 years old when he first saw me riding the school bus and determined that he would, someday, marry me. (I was 13 years old.) He was 23 years old when we married; was 25 years old when he became a father for the first time -- and the "FREE" grid in the middle represents (to me) when he received the FREE gift of salvation through Jesus Christ, at 27 years of age.
The sentiment was stamped with PTI Vintage Cream ink on S.U.! Close To Cocoa card stock and punched with an ek label punch. The large PTI punched numerals reveal that he is now a man of 60 years! Doesn't seem possible.
On the kraft card stock base, I adhered a bit of plaid wallpaper (donated to me by a local wallpaper business). The Bingo card is from a S.U.! background stamp. The numerals I stamped in the grids have special meaning...
Jer was 15 years old when he first saw me riding the school bus and determined that he would, someday, marry me. (I was 13 years old.) He was 23 years old when we married; was 25 years old when he became a father for the first time -- and the "FREE" grid in the middle represents (to me) when he received the FREE gift of salvation through Jesus Christ, at 27 years of age.
The sentiment was stamped with PTI Vintage Cream ink on S.U.! Close To Cocoa card stock and punched with an ek label punch. The large PTI punched numerals reveal that he is now a man of 60 years! Doesn't seem possible.
Labels:
birthday card,
masculine card,
PTI,
rubber stamping
Friday, July 1, 2011
BIRTHDAY CARD FOR MOM
My mom (and her mom before her) is a Fourth of July baby! Most of the cards that I have made her through the years have had a patriotic theme, so I wanted to do something DIFFERENT this year.
Making this year's card was a BLAST! I love kraft card stock, so used that as my card base and stamped dots at the top, middle, and bottom with PTI Vintage Cream ink on an Inkadinkadoo stamp.
Coordinating dsp panels were distressed and adhered and a fiber border added. A scrunched flower, made from pages of an old children's book, was adhered at the top of the card. The S.U.! "Happy Birthday" sentiment was stamped with "Bordering Blue" S.U.! ink, punched out, and adhered with S.U.! Dimensionals.
A Nestabilities die was used to cut the frame on the inside of the card, which was wrapped with red and white baker's twine. A shipping tag was trimmed and used as a spot for my personal message, which had to be written before the card could be assembled. (Explains why I didn't photo the inside of the card before writing my mom's message.) Three self-stick chocolate brown "gems" were added on the bottom to complete the inside.
Jer has a birthday on July 03, so I have to "get with the program" and get him a card made right away! And, I must make a baby shower card for my daughter, Moriah...a FIRST birthday card for my grandson, Hoyt...and a requested paper bag mini-album for my soon-to-be-born grandson, Preston! Whew!! Good thing that I do better creating while under pressure!
Be back soon with a masculine card!
Making this year's card was a BLAST! I love kraft card stock, so used that as my card base and stamped dots at the top, middle, and bottom with PTI Vintage Cream ink on an Inkadinkadoo stamp.
Coordinating dsp panels were distressed and adhered and a fiber border added. A scrunched flower, made from pages of an old children's book, was adhered at the top of the card. The S.U.! "Happy Birthday" sentiment was stamped with "Bordering Blue" S.U.! ink, punched out, and adhered with S.U.! Dimensionals.
A Nestabilities die was used to cut the frame on the inside of the card, which was wrapped with red and white baker's twine. A shipping tag was trimmed and used as a spot for my personal message, which had to be written before the card could be assembled. (Explains why I didn't photo the inside of the card before writing my mom's message.) Three self-stick chocolate brown "gems" were added on the bottom to complete the inside.
Jer has a birthday on July 03, so I have to "get with the program" and get him a card made right away! And, I must make a baby shower card for my daughter, Moriah...a FIRST birthday card for my grandson, Hoyt...and a requested paper bag mini-album for my soon-to-be-born grandson, Preston! Whew!! Good thing that I do better creating while under pressure!
Be back soon with a masculine card!
Saturday, June 18, 2011
MASCULINE Birthday Card for Son who will be TWENTY!
OOOH, MY GOODNESS! I cannot...repeat...CANNOT believe that my Colson will be TWENTY YEARS OLD on Monday!!! I am determined not to get all "mushy," about it, here, but...sniff...
Here are the details of how I made his MANLY card:
I wanted to use tools from my supplies that I'd not, yet, used -- not a tough call, since MOST of my tools haven't been put to work.
I cut three pages from a wallpaper book that I'd been given. One page looks like leather, so I used it with my PTI "Tabbed MiniBook Page" die to create covers for an attached-to-card booklet. Inside, "dusty peach" pages were embossed with a Sizzix "notebook" folder and trimmed to fit. For fun, I jotted down notes on the pages that give a few details of Colson's life and "likes." The booklet covers and pages were distressed with ink and with a distresser tool to rough 'em up a little.
The front of the booklet was decorated with both wallpaper and card stock die-cuts made with PTI "Mat Stack 1," "Mat Stack 2," and "Numbers" dies. Twine was wrapped around the front cover to provide a bit of fiber to the card.
A strip of wallpaper was adhered to the bottom of the card front and a card stock banner was stamped, hand-cut, and adhered atop it.
Distressed card stock and a layered wallpaper strip were adhered to the inside of the card for Colson's dad and my messages.
Next, will be to bake him my OH, SO SPECIAL yellow cake with chocolate-mocha frosting!! (Colson likes my cake EVEN MORE than my handmade cards!)
Here are the details of how I made his MANLY card:
I wanted to use tools from my supplies that I'd not, yet, used -- not a tough call, since MOST of my tools haven't been put to work.
I cut three pages from a wallpaper book that I'd been given. One page looks like leather, so I used it with my PTI "Tabbed MiniBook Page" die to create covers for an attached-to-card booklet. Inside, "dusty peach" pages were embossed with a Sizzix "notebook" folder and trimmed to fit. For fun, I jotted down notes on the pages that give a few details of Colson's life and "likes." The booklet covers and pages were distressed with ink and with a distresser tool to rough 'em up a little.
The front of the booklet was decorated with both wallpaper and card stock die-cuts made with PTI "Mat Stack 1," "Mat Stack 2," and "Numbers" dies. Twine was wrapped around the front cover to provide a bit of fiber to the card.
A strip of wallpaper was adhered to the bottom of the card front and a card stock banner was stamped, hand-cut, and adhered atop it.
Distressed card stock and a layered wallpaper strip were adhered to the inside of the card for Colson's dad and my messages.
Next, will be to bake him my OH, SO SPECIAL yellow cake with chocolate-mocha frosting!! (Colson likes my cake EVEN MORE than my handmade cards!)
Sunday, June 5, 2011
MASCULINE BIRTHDAY CARD
This is the card I made for my son, Colson, for his 19th birthday. Since his childhood passed entirely TOO quickly for my liking, I thought that "clocks" would make a good background.
The base is kraft cs, with Tim Holtz paper layered atop -- and a strip of green paper at the bottom of the card as an anchor for the sentiment. A shipping tag was sponged and Sizzix alpha die-cuts were used to spell-out his name. A bit of rough twine added a subtle touch.
This month, Colson turns TWENTY -- passing from his teens to manhood!!! (sniff)
The base is kraft cs, with Tim Holtz paper layered atop -- and a strip of green paper at the bottom of the card as an anchor for the sentiment. A shipping tag was sponged and Sizzix alpha die-cuts were used to spell-out his name. A bit of rough twine added a subtle touch.
This month, Colson turns TWENTY -- passing from his teens to manhood!!! (sniff)
Thursday, January 27, 2011
Birthday card for my 17 yr. old daughter
Subscribe to:
Posts (Atom)